
들어가지 전에
이전 헤스켈 설치 포스트를 따라 제대로 설정했다면 해당 포스트에서 모든 기능이 제대로 동작할 것이다.
프로젝트 생성
Haskell 프로젝트는 stack new <project-name>을 사용에 생성할 수 있다.
stack new gs-haskell
프로젝트 설정
프로젝트를 생성 했다고 바로 쓸 수 있는것이 아니라 필요한 라이브러리를 땡겨오는 설정이 필요하다.
cd gs-haskell
stack setup

Stack has not been tested with GHC versions above 8.6, and using 8.8.3, this may fail
Preparing to install GHC to an isolated location.
This will not interfere with any system-level installation.
ghc-8.8.3:   23.24 MiB / 259.72 MiB (  8.95%) downloaded...^C
하지만 갑자기 8.6에서는 테스트 되지 않았다면서 GHC 8.8.3 버전을 설치하려고 하는것을 볼 수 있다. 그냥 내비두고 사용해도 상관없지만 지금까지 설정을 GHC 8.6에 맞춰 구성 했으므로 stack.yaml을 GHC8.6을 사용하도록 약간 수정하자.
stackage 사이트에 ghc-8.6.5로 검색하면 lts-14.27이 나온다 따라서 stack.ymal 파일에서 resolver를 15.8에서 14.27로 다음과 같이 다운 그레이드 하자.
# stack.yaml
# ...

# The location of a snapshot can be provided as a file or url. Stack assumes
# a snapshot provided as a file might change, whereas a url resource does not.
#
# resolver: ./custom-snapshot.yaml
# resolver: https://example.com/snapshots/2018-01-01.yaml
resolver: lts-14.27

# ...
이제 다시 stack setup을 실행하면 다음과 같은 메시지가 나올 것이다
stack will use a sandboxed GHC it installed
For more information on paths, see 'stack path' and 'stack exec env'
To use this GHC and packages outside of a project, consider using:
stack ghc, stack ghci, stack runghc, or stack exec
Hello World 작성
혹시라도 VS Code로 폴더를 열었을 때 다음과 같은 경고가 난다면 무시하자.
cannot satisfy -package-id gs-haskell-0.1.0.0-2J7PzFtne691f39TvDDj6F (use -v for more information)
이제 VS Code에서 gs-haskell 폴더를 열고 프로젝트 구조를 살펴보자. 프로젝트에는 다음의 3개 폴더가 있음을 볼 수 있다.
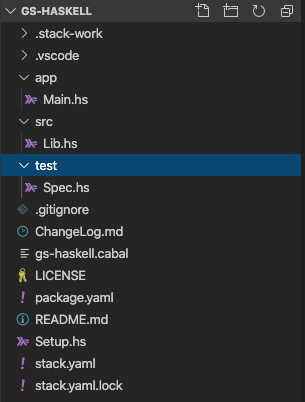
너무 직관적이라 설명할 것이 필요 없다고 생각된다. 해당 폴더를 열어서 살펴보자 app 폴더 밑에는 프로그램의 시작점인 Main.hs가 있다.
# Main.hs

module Main where

import Lib

main :: IO ()
main = someFunc
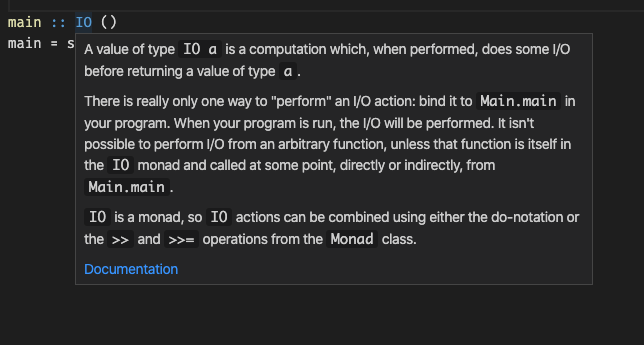
IO위에 마우스 커서를 올려보자 문서가 보여야 하는데 안보일 것이다. 다음을 콘솔에서 실행하자.
stack haddock --keep-going
이제 마우스를 올려 IO 위에 올려 보면 IO에 대한 설명이 다음과 같이 잘 나올것이다.
main 함수에서 Lib을 import 함을 볼 수 있었으므로 src폴더에 있는 Lib.hs 파일에 있는 함수를 수정해보자.
# src/Lib.hs

-- 생략 ...
someFunc :: IO ()
someFunc = putStrLn "Hello world"
혹시라도 잘못 입력하면 이렇게 hlint가 알려주는 것을 볼 수 있다.
이제 빌드전에 프로젝트를 테스트 해보자. test폴더 밑에 Spec.hs 파일이 있다.
-- Spec.hs

main :: IO ()
main = putStrLn "Test suite not yet implemented"
다소 황당한 테스트지만 어찌 됐든 실행해보자.
stack test
# 생략 ...
Completed 2 action(s).
테스트가 성공 했으니 이제 프로젝트를 빌드해보자.
stack build
# 생략 ...
Installing executable gs-haskell-exe in /Users/shootingstar/Code/gs-haskell/.stack-work/install/x86_64-osx/5f10f8.../8.6.5/bin
Registering library for gs-haskell-0.1.0.0.
build 할 때 보여준 폴더로 이동해서 파일을 실행 해보자
cd .stack-work/install/x86_64-osx/5f10f8.../8.6.5/bin
./gs-haskell-exe
Hello world from testFunc
잘 실행되는 것을 볼 수 있다.